LED screen setup for live events: the complete guide
Date added: 9/07/2026

LED screen setup for live events is the process of planning, assembling, and calibrating modular LED display panels to deliver clear, bright visuals to every seat in a venue. The industry term for the primary display format is an LED video wall, and getting it right requires decisions on pixel pitch, brightness, rigging, and signal routing long before the first panel goes up. Poor planning is the leading cause of onsite failures, from structural collapses to colour inconsistency. This guide gives event professionals a practical, step-by-step framework covering selection, preparation, installation, and troubleshooting for any scale of live event.
How to set up LED screens for live events: choosing the right display
Pixel pitch is the most significant factor for image clarity in any live event display. It refers to the distance in millimetres between the centre of one LED cluster and the next. The smaller the pitch, the sharper the image at close range.
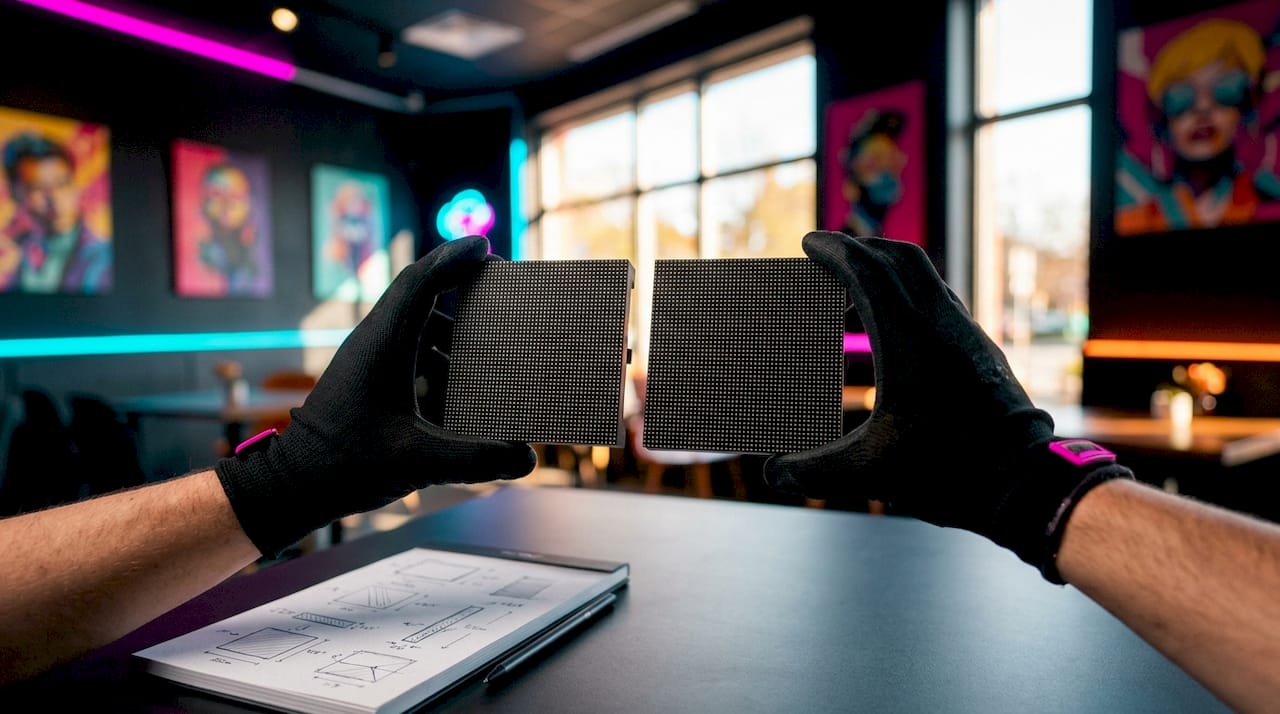
Recommended pitch ranges follow viewing distance: P1.9–P2.9 suits indoor conferences where audiences sit within 3–6 metres, P3–P4 works for indoor stages with mid-range sightlines, and P4–P6 is appropriate for large outdoor events where viewers stand further back. Choosing a pitch that is too coarse for the viewing distance produces a pixelated image that undermines the entire production.
Brightness is the second critical variable. Outdoor LED screens require 5,500–7,000 nits to compete with direct sunlight, while indoor screens perform well at 800–2,000 nits without causing glare. Running an outdoor panel at indoor brightness settings renders the content invisible in daylight.
Screen size and environmental factors
Screen size follows a straightforward rule: the furthest viewer in the venue determines the minimum screen height. A general industry benchmark is that screen height should equal roughly one-tenth of the maximum viewing distance. A 30-metre viewing distance therefore calls for a screen at least 3 metres tall.
For outdoor setups, IP ratings matter as much as brightness. An IP65-rated enclosure protects against dust ingress and water jets, making it the minimum standard for any temporary outdoor screen setup exposed to British weather. IP54 is acceptable for covered outdoor areas but not open-air stages.
| Environment | Pixel pitch | Brightness | IP rating |
|---|---|---|---|
| Indoor conference | P1.9–P2.9 | 800–1,500 nits | Not required |
| Indoor stage | P3–P4 | 1,000–2,000 nits | Not required |
| Covered outdoor | P4–P5 | 3,000–4,500 nits | IP54+ |
| Open-air outdoor | P5–P6 | 5,500–7,000 nits | IP65+ |
Key considerations when finalising your screen specification:
- Confirm the furthest and closest viewer distances before ordering panels
- Account for ambient light sources, including windows, stage wash, and daylight
- Verify that the chosen pixel pitch is available in the panel format you need
- For LED display rental, confirm that the supplier’s stock matches your pitch requirement
What preparation does an LED screen installation require?
Rushing the site survey is the leading cause of onsite LED screen failures. A thorough site survey produces a CAD drawing that maps screen position, rigging points, cable runs, and power distribution before any equipment arrives on site.
Structural rigging demands a load calculation for every hanging point. LED video walls are heavy. A 6x4 metre wall using standard rental cabinets can weigh over 400kg. Truss systems must be rated above that figure with a safety margin, and ground support structures need base plates sized for the floor surface. Stage depth must also account for a back-rigging and cabling footprint of 1–2 metres, a detail that is frequently overlooked when planning tight stage layouts.
Power distribution planning is equally non-negotiable. LED walls draw significant current, and sharing circuits with lighting or audio equipment without load balancing causes voltage drops and tripped breakers mid-show. Each screen zone should have a dedicated power feed with surge protection at the distribution board.
Pro Tip: Always request the venue’s electrical single-line diagram before finalising your power plan. It shows the exact capacity of each circuit and prevents surprises on the day.
Preparation checklist before any LED installation:
- Complete a physical site survey and produce a scaled CAD layout
- Calculate rigging loads and confirm truss or ground support ratings
- Identify dedicated power circuits and confirm total amperage available
- Map all signal cable routes from video processor to each panel zone
- Confirm access routes for flight cases and panel delivery to the stage
How do you assemble and calibrate an LED video wall on site?
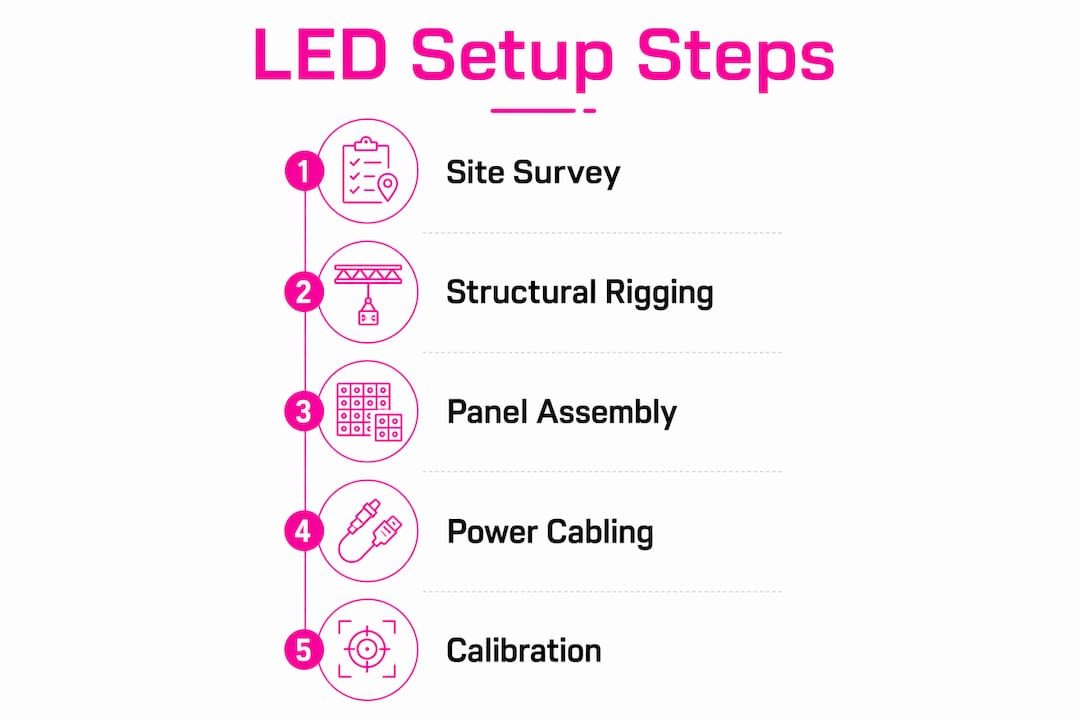
Professional LED setup follows a defined technical pipeline: site survey and CAD planning, structural rigging, panel assembly and interlocking, power and signal distribution, and video processor mapping with calibration. Skipping or compressing any stage creates problems that compound later.
Panel assembly begins with the rigging frame or ground support structure. Panels lock together using quick-lock mechanisms, typically a combination of magnetic alignment pins and locking levers. Work from the centre outward to keep the wall plumb. A wall that is even slightly bowed or twisted will show visible seams under stage lighting.
Power and signal cabling
Power cables run from the distribution board to each panel column. Signal cables, most commonly fibre optic or Cat6 for longer runs, carry the video feed from the processor to the first panel in each chain, then daisy-chain through the column. Keep power and signal cables physically separated where possible to reduce interference.
Pre-assembly and calibration in a controlled environment before site delivery prevents colour inconsistencies caused by batch variations in LED modules. Minor differences between manufacturing batches are invisible to the eye in isolation but become obvious when panels sit side by side on a live wall. Testing and matching panels before they leave the warehouse is far more efficient than correcting colour shifts on a dark stage at midnight.
Pro Tip: Bring a calibration laptop and the video processor’s software to every installation. On-site brightness and colour temperature adjustments take under 30 minutes and prevent the washed-out look that plagues poorly integrated LED walls.
Step-by-step installation sequence:
- Erect and level the rigging structure or ground support frame
- Hang or stack panels from centre outward, engaging all locking mechanisms
- Connect power feeds to each panel column and test for voltage stability
- Run signal cables from the video processor to each panel chain
- Power up the wall in sections and check for dead pixels or colour anomalies
- Map the full resolution in the video processor and assign input sources
- Calibrate brightness and colour against the ambient light conditions in the venue
- Run a full content test with the actual show files before the audience arrives
What are the most common LED screen problems at live events?
Refresh rate is the most misunderstood technical specification in live event LED. Screens must run at a minimum of 3,840Hz to prevent strobing or rolling lines when captured on camera. Visual artefacts appear below this threshold and are particularly damaging for broadcast and social media content, where the camera shutter interacts with the screen’s scan rate.
Flicker and blackouts during a show almost always trace back to signal integrity problems. Loose connectors, cable runs that exceed the recommended length for the signal type, or a video processor that is outputting a resolution the panels cannot accept all cause the same symptom. The fix is methodical: check the processor output first, then trace the signal chain panel by panel.
Colour drift mid-show is a subtler problem. LED panels warm up over the first 20–30 minutes of operation and their colour temperature shifts slightly. Running a 30-minute warm-up before the audience enters and recalibrating after warm-up eliminates this issue entirely. Failing to synchronise LED wall colour temperature with stage lighting leads to washed-out subjects on camera, making this step critical for any event that involves live video capture.
Common issues and their fixes:
- Strobing or rolling lines: check refresh rate setting in the processor; raise to 3,840Hz minimum
- Dead panel or black zone: use quick-lock panel replacement protocol; a faulty module swaps out in under 5 minutes from front or back
- Colour mismatch between panels: run calibration software; if persistent, check panel batch numbers
- Signal dropout: inspect all connectors and cable lengths; replace any run exceeding the signal type’s rated distance
- Washed-out image: reduce ambient light, increase screen brightness, or adjust the video processor’s output levels
Key takeaways
A successful LED video wall installation depends on matching pixel pitch to viewing distance, completing a rigorous site survey, and calibrating the display before the audience arrives.
| Point | Details |
|---|---|
| Pixel pitch determines clarity | Match pitch to viewing distance: P1.9–P2.9 for close indoor use, P4–P6 for outdoor events. |
| Brightness must suit the environment | Indoor screens need 800–2,000 nits; outdoor screens require 5,500–7,000 nits. |
| Site survey prevents failures | Structural loads, power capacity, and cable routes must be verified before installation begins. |
| Pre-calibration avoids colour drift | Test and match panels in a controlled environment before delivery to eliminate batch inconsistencies. |
| Refresh rate protects broadcast quality | Run screens at 3,840Hz minimum to prevent strobing in camera and social media capture. |
Why preparation is the only thing that actually matters
Event professionals often ask me which panel brand or pixel pitch they should use. My honest answer is that the choice of hardware matters far less than the quality of preparation behind it.
I have seen beautifully specified LED walls fail on the night because nobody confirmed the venue’s power capacity. I have also seen modest P4 panels deliver a genuinely impressive result because the team ran a proper site survey, pre-calibrated every cabinet, and built a 30-minute warm-up into the schedule. The hardware is almost never the problem.
The detail that most event organisers underestimate is the integration between the LED wall and the rest of the stage environment. Failing to coordinate LED colour temperature with stage lighting is the single most common reason a live event looks great in the room but terrible on camera. If your event involves any video capture, treat the LED wall, the lighting rig, and the camera system as one integrated unit, not three separate departments.
Creative configurations like curved screens, angled side panels, and LED floors are worth considering for events where audience immersion is the goal. They require more rigging complexity and a longer calibration window, but the visual impact is substantial. For one-off events, renting LED screens with a full technical crew is almost always the right call. Owning equipment without trained operators carries real liability in a live setting.
— Michael
Fireflyav’s LED and AV equipment for live events
Fireflyav supplies professional AV equipment and technical support to the live event, corporate, broadcast, and cultural sectors. Whether you are planning a single-day conference or a multi-day festival stage, the right display technology makes a measurable difference to audience engagement.
Fireflyav’s rental inventory includes the Absen LED M2.9 Pro video wall panel, a high-performance rental cabinet suited to indoor stages and corporate conferences. The team provides end-to-end technical support covering rigging, calibration, and on-site operation. For a full overview of the display and AV technology available for your next event, the AV equipment guide covers everything from LED video walls to signal processing. You can also submit your project details directly to discuss your specific requirements with the Fireflyav team.
FAQ
What pixel pitch should I use for a live event?
Pixel pitch depends on viewing distance: use P1.9–P2.9 for indoor conferences, P3–P4 for indoor stages, and P4–P6 for outdoor events where audiences are further from the screen.
How bright does an LED screen need to be outdoors?
Outdoor LED screens require 5,500–7,000 nits to remain visible in direct sunlight. Indoor screens perform well at 800–2,000 nits without causing eye strain or glare.
What refresh rate do LED screens need for live event video?
Screens need a minimum of 3,840Hz to prevent strobing or rolling lines when captured on camera, which is critical for broadcast and social media content.
How quickly can a faulty LED panel be replaced during a live event?
Quick-lock modular panels can be isolated and swapped in under 5 minutes from the front or back of the wall, allowing technicians to restore full display output without interrupting the event.
Should I rent or buy LED screens for my event?
Renting suits infrequent events because rental packages include specialist labour for rigging, calibration, and technical operation. Purchasing only makes financial sense when events run frequently enough to justify the ongoing maintenance and crew costs.